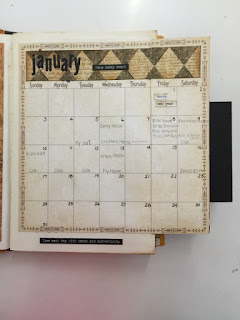
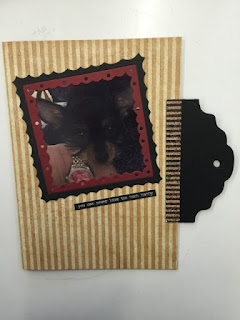
Hello, it’s Angela and this month’s designer challenge was to design a unique calendar that gets 2016 off to a creative start. What’s on trend right now are planners and I wanted create a project with this in mind. I purchased a children’s encyclopedia from 1963 containing about 80 pages. Old books are quite sturdy and the pages are already distressed so this made a perfect base for my book that was going to become my personal planner for 2016. I used my favorite paper collection of all time and my favorite tag dies and made a planner that is perfect for me. Let me share with you how it was created.
Cover:
*Measure the cover of the book, cut the design paper and glue to the front and back of the book
*Cut the spine design paper the length of the cover and 3” wide and glue onto the spine of the book
*Die cut frames from black cardstock glue to cover to highlight certain graphic of the design paper
*Add the metal “pull” handle
Inside Cover of Book:
*Measure the length and width of the inside cover, cut design paper and glue inside over existing paper
Create top slide pocket and tag:
*Glue page 1 and page 2 of the book together on the bottom and right side to create a top pocket
*Die cut a black tag from 12” x 4.5”cardstock, cut down to fit into pocket at desired length
*Add ribbon, phone brad, lined paper, design paper to tag and stamp with January
*Cut design paper to 11” x 8.5”, score at 5.5”, fold and glue to the front of back of the pocket page
*Decorate page with design paper, photos, tags and phrases
*Write on tag birthdays, anniversaries, etc for the month
Create Side Pocket Page and Tag:
*Glue page 3 and 4 at the top and bottom of the pages to create a side pocket
*Score 8x8 calendar page between Thursday and Friday, glue to page 3
*Cut a piece of design paper 7.25” x 1.25” and cover the word January on the 8x8 page
*Die cut “JANUARY” in black from the alphabet die and glue to the design paper on the calendar
*Cut design paper 8” x 2.25” and place on the fold of the 8x8 calendar flap
*Mat the January 3 x 4 preprinted calendar on black and add to the flap
Create the Side Pocket Pull Out:
*Cut design paper 8” x 11.5” and score at 5.75” and fold to create a “folder”
*Die cut two tags tops from black cardstock at the same time (mirror images)
*Glue to the edge of the folder on the open side
*Cut 2 pieces of design paper 4.25” X 1/2” and glue to the bottom of the tags
*On front of folder, cut 1 black and 1 red cardstock frame that nest and frame a photo and glue
*Place folder in pocket
*Decorate back of page with design paper 8.25” x 5.75”
*Repeat above for February through December calendar pages
1062 Fitted Frames 2 Lace
960 Tags & More 7 Vine
961 Tags 7 More 8 Lattice
1075 Alphabet lower case
Other Products Used:
Old book
Graphic 45 Communique Collection Pack 2009
Graphic 45 Time to Flourish Calendar Pad
Graphic 45 Time to Flourish month stamps
Carta Bella Christmas Wonderland Naughty/Nice 12 x 12 sheet
Spare Parts telephone brads
Tim Holtz Idea-ology small talk phrases
7-Gypsy metal door pull
Custom Calendar page 12 x 12
Black and red cardstock
Black and red crepe ribbon
Scrapbook Adhesives photo corners
Ranger Archival Ink in Coffee
Sponge for inking


